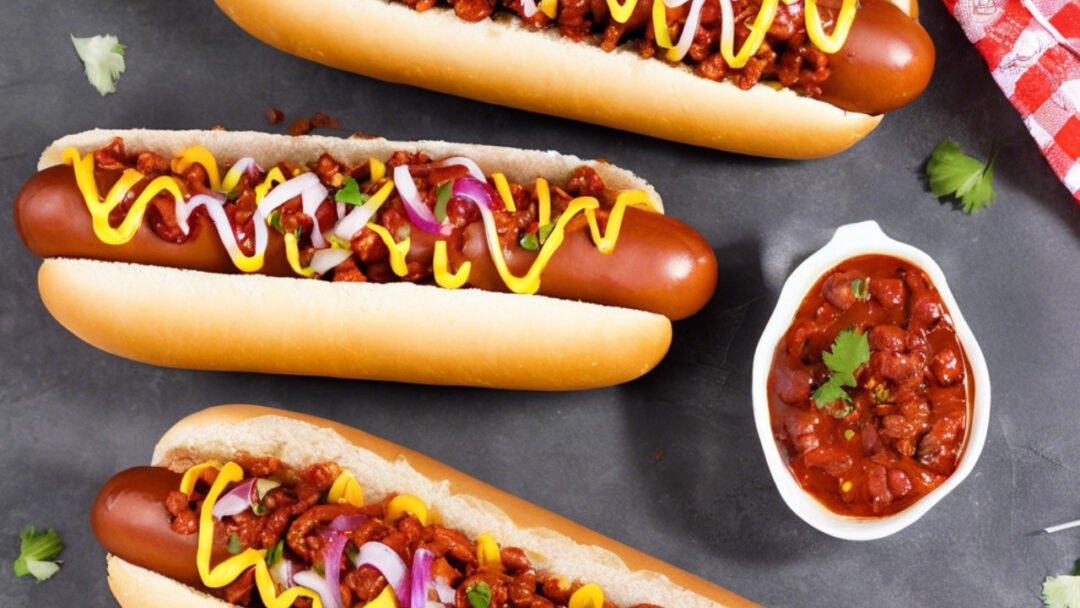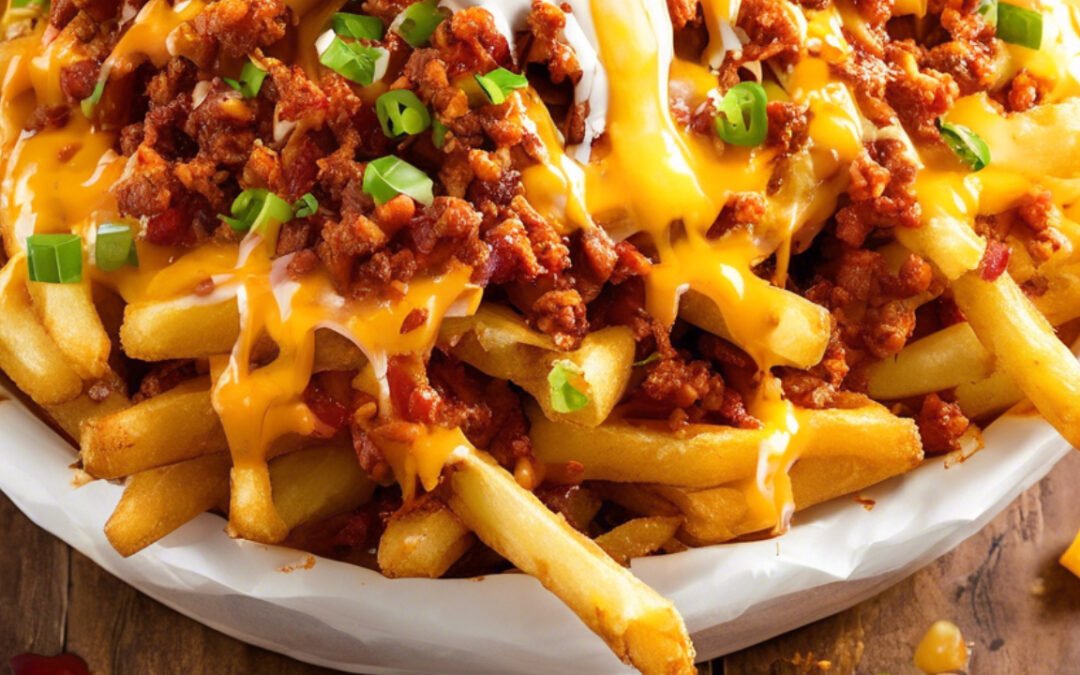
Chili Cheese Fries: The Best Quick And Easy Comfort Food

Chili Cheese Fries: The Best Quick And Easy Comfort Food

Chili Cheese Fries: The Best Quick And Easy Comfort Food



Extra Hot Dipping Sauce
Original Hot Sauce



Prep Time: 15 minutes
Cooking Time: 30 minutes



Servings: 4
Serving Size: A generous portion  per person

Chili Cheese Fries are a delectable and indulgent comfort food featuring crispy fries, spicy chili, and melted cheese. The dish offers a tantalizing blend of textures and flavors, making it perfect for a cozy night in, game day treat, or party appetizer. The versatile recipe allows for customization of spice levels and pairs well with sides like coleslaw or soup. The included recipe for the dish, along with FAQs, provides helpful tips for preparing and serving this irresistible dish.

Ingredients

For the Fries:

1 pound frozen French fries

Oil for frying

For the Chili:

1 lb ground beef

1 small onion, chopped

2 cloves garlic, minced

1 can (15 oz) chili beans, undrained

1 can (8 oz) tomato sauce



1 tablespoon Extra Hot Dipping Sauce

Salt and pepper to taste

For the Cheese Topping:

1 cup shredded cheddar cheese

Instructions

Step 1

Bake or fry the frozen French fries according to the package instructions until they are crispy and golden brown.

Step 2

In a large skillet, cook ground beef over medium-high heat until browned and crumbly. Drain excess fat.

Step 3

Add chopped onion and minced garlic to the skillet with the beef. Sauté until the onion is translucent.

Step 4

Stir in chili beans, tomato sauce, Extra Hot Dipping Sauce, salt, and pepper. Simmer for 10-15 minutes, allowing the flavors to meld.

Step 5

To assemble, place a generous portion of hot fries on a serving plate. Spoon the chili mixture over the fries.

Step 6

To assemble, place a generous portion of hot fries on a serving plate. Spoon the chili mixture over the fries.

Step 7

Serve immediately, and savor the deliciousness of Chili Cheese Fries!

Frequently Asked Questions

Ultimate Guide to Buffalo Chicken Wings: Unleash Your Inner Grill Master with These Finger-Lickin’ Finger Foods

Ultimate Guide to Buffalo Chicken Wings: Unleash Your Inner Grill Master with These Finger-Lickin' Finger Foods

If you’re a fan of the tantalizing aroma of the grill or the irresistible allure of oven-baked goodness, then prepare to embark on a culinary adventure with grilled buffalo chicken wings.

Whether you prefer the charred perfection of grilled chicken wings or the succulent tenderness of oven-baked ones, these spicy, tangy delights are sure to leave you craving for more.

Join me as I unveil the secrets to creating mouthwatering buffalo chicken wings.

Why Buffalo Chicken Wings Are Incredibly Irresistible

Buffalo chicken wings are irresistibly delicious due to a combination of factors that make them a favorite snack or meal for many people.

The crispy texture of the fried chicken wings paired with the tangy and spicy buffalo wing sauce creates a perfect harmony of flavors and textures.

The spicy kick from the hot sauce, balanced with the cooling effect of the accompanying blue cheese or ranch dressing, adds an addictive element to the dish.

Additionally, the convenience of eating them with your hands and the communal aspect of sharing a plate of wings with friends or family during social gatherings adds to their appeal.

The versatility of buffalo wings also allows for variations in spiciness and flavor, catering to a wide range of palates.

These factors combined make buffalo chicken wings an irresistible and popular choice for many food enthusiasts.

The perfect Buffalo Chicken Wings BBQ Recipe

Now, let’s get down to business and unveil the secret to a grilled buffalo wing recipe for finger-lickin’ good buffalo wings BBQ. Here’s what you’ll need:

Essential ingredients for Buffalo Chicken Wings BBQ

  • 2 pounds of chicken wings
  • 1 cup of your favorite hot sauce
  • 1/2 cup of melted butter
  • 2 tablespoons of Worcestershire sauce
  • 1 tablespoon of garlic powder
  • 1 tablespoon of onion powder
  • Salt and pepper to taste

Step-by-step instructions for grilling buffalo chicken wings

  1. Preheat your grill to medium-high heat.
  2. In a large bowl, combine the hot sauce, melted butter, Worcestershire sauce, garlic powder, onion powder, salt, and pepper. Mix well.
  3. Add the chicken wings to the bowl and toss them in the marinade until they’re evenly coated.
  4. Place the chicken wings on the grill and cook for about 10-12 minutes per side, or until they’re golden brown and cooked through.
  5. While the chicken wings are grilling, baste them with the remaining marinade every few minutes to keep them moist and flavorful.
  6. Once the chicken wings are cooked, remove them from the grill and let them rest for a few minutes before serving.

Tips for achieving the perfect char and flavor

Grilling buffalo chicken wings is an art form, and with a few grilling tips and tricks up your sleeve, you can achieve the perfect char and flavor every time.

Here’s how long to cook chicken wings on the grill and how to grill chicken wings like a pro to take your grilling wings game to the next level:

  • Make sure your grill is properly preheated to ensure that the chicken wings cook evenly and develop a nice char.
  • Basting the chicken wings with the marinade while they’re grilling not only How can I help you further with grilling in the oven? If you have any specific questions or need additional information, feel free to ask!adds flavor but also helps prevent them from drying out.
  • For extra crispy skin, you can place the chicken wings directly over the flame for a minute or two at the end of the cooking process.
  • Don’t be afraid to experiment with different hot sauces to find the perfect level of spiciness for your taste buds.
  • Serve the buffalo chicken wings immediately after grilling to enjoy them at their peak flavor.

The Perfect Oven-Baked Buffalo Chicken Wings Recipe

If you’re looking for a delicious and easy party snack, oven-baked buffalo chicken wings are the perfect choice.

This grilled chicken wings recipe combines the classic flavors of buffalo sauce with the convenience of oven baking, making it a crowd-pleaser for any gathering.

Whether you’re hosting a game day get-together or simply craving a savory treat, these bbq sauce wings are sure to be a hit.

Plus, with minimal prep and simple ingredients, you can spend less time in the kitchen and more time enjoying the party.

Essential ingredients for Oven-Baked Buffalo Chicken Wings

To make these scrumptious buffalo chicken wings, you will need the following ingredients:

  • 2 lbs chicken wings
  • 1/2 cup hot sauce
  • 1/3 cup melted butter
  • 1 teaspoon garlic powder
  • 1 teaspoon paprika
  • Salt and pepper to taste
  • Optional: blue cheese or ranch dressing for dipping

Step-by-step instructions for Oven-Baked Buffalo Chicken Wings

  1. Preheat the Oven: Preheat your oven to 400°F (200°C) and line a baking sheet with parchment paper.
  2. Prepare the Wings: Pat the chicken wings dry with paper towels and place them in a large bowl. Season the wings with salt, pepper, garlic powder, and paprika, and toss them until evenly coated.
  3. Bake the Wings: Arrange the seasoned wings on the prepared baking sheet in a single layer. Bake in the preheated oven for 45-50 minutes, or until the wings are golden brown and crispy.
  4. Make the Buffalo Sauce: In a separate bowl, combine the hot sauce and melted butter, stirring until well mixed.
  5. Coat the Wings: Once the wings are done baking, transfer them to a clean bowl. Pour the buffalo sauce over the wings and toss them until they are fully coated.
  6. Serve and Enjoy: Arrange the saucy buffalo chicken wings on a platter and serve them with your choice dipping sauce.

Now you’re ready to enjoy these irresistibly flavorful grilled buffalo wings straight from the oven.

Whether it’s for a party or a casual gathering, these wings are bound to be a hit with everyone.

Dipping Sauce that goes well with Buffalo Chicken Wings

Enhancing the enjoyment of buffalo chicken wings, the addition of a spicy buffalo wing sauce as a complementary dipping sauce provides a flavorful and customizable accompaniment, balancing the spiciness and texture of the dish.

Classic Dipping Sauces for Buffalo Chicken Wings

When it comes to buffalo chicken wings, the classic ranch dressing paired with buffalo wing sauce is always a hit.

Here are some popular choices:

  1. Blue Cheese Dressing: The tangy flavor of blue cheese dressing complements the spicy kick of buffalo wings perfectly.
  2. Ranch Dressing: Creamy and cooling, ranch dressing is another classic choice that pairs well with the heat of buffalo wings.
  3. Honey Mustard: For a touch of sweetness, honey mustard can be a delicious dipping option for buffalo wings.

Unique Dipping Sauces to Try

If you’re looking to switch things up, consider these unique dipping sauces, including a twist on the classic buffalo wing sauce, for a new take on your buffalo wings:

  1. Garlic Parmesan Dip: A creamy garlic parmesan dip can add a rich and savory element to your buffalo wings.
  2. Barbecue Sauce: The smoky sweetness of barbecue sauce can provide a tasty contrast to the spiciness of buffalo wings.
  3. Asian-Inspired Dipping Sauce: Try a soy-based or sweet chili dipping sauce for an Asian-inspired twist on your buffalo wings.

Homemade Dipping Sauce Recipes

If you enjoy making your own sauces, here are a couple of simple recipes to try, including chicken wing rubs and a savory chicken wing seasoning for brine:

  • Spicy Mayo Dip: Mix mayonnaise with a dash of hot sauce and a squeeze of lemon juice for a quick and spicy dipping sauce.
  • Buffalo Blue Dip: Combine blue cheese dressing with a splash of buffalo sauce for a tangy and spicy homemade dip.

Feel free to experiment with these dipping sauces, perhaps adding a dash of buffalo wing sauce, to find your favorite combination with buffalo chicken wings!

Serving suggestions and sides for buffalo chicken wings BBQ

No grilled buffalo wings BBQ is complete without some delicious sides to complement the fiery flavors.

Whether it’s a creamy blue cheese dip, a tangy wing sauce, or smoky bbq chicken wings, here are a few ideas to get you started on your grilled barbecue wings feast:

  • Classic celery and carrot sticks with blue cheese or ranch dressing for dipping.
  • Creamy coleslaw to cool down the heat and add some crunch.
  • Grilled corn on the cob brushed with butter and sprinkled with chili powder for a smoky twist.
  • Baked beans with bacon for a hearty and flavorful side dish.
  • Sweet potato fries for a slightly sweet and savory pairing.

Enjoy Your finger-lickin' good buffalo chicken wings!

In conclusion, you now possess the ultimate hot wings recipe grilled, perfect for impressing friends and family alike.

Whether you opt for the traditional grilled buffalo wings recipe or the convenient oven approach, these finger-lickin’ good wings on the grill recipe are sure to be a hit at any gathering.

So, grab a cold drink, fire up the grill, or preheat the oven, and get ready to indulge in the tantalizing flavors of these delectable buffalo wings.

Get ready to elevate your wings game and enjoy the mouthwatering goodness!

CTA: Dive into the irresistible world of grilled chicken wings with our BBQ recipe at your next barbecue, and witness your guests rave about the smoky, spicy flavors. Perfectly grill chicken wings on the grill and let us know how your chicken wings turned out in the comments below!

Ultimate Guide to Grilled Spareribs: Perfectly Tender and Flavorful Ribs

Ultimate Guide to Grilled Spareribs: Perfectly Tender and Flavorful Ribs

The allure of grilled spareribs lies in their perfect blend of smoky barbecue flavors, tender ribs, and a caramelized crust that makes them a highlight of any barbecue ribs feast.

If you’re eager to learn how to grill spareribs like a pro, you’ve arrived at the right destination.

Our comprehensive guide will walk you through the essential steps to consistently achieve tender ribs that are bursting with flavor every time you fire up the grill.

The History of Spareribs and BBQ

The history of spareribs is rich and extensive, tracing back to ancient civilizations where the tradition of slow-cooking meat over an open flame was widespread.

The Native Americans, however, were pivotal in introducing the European settlers to the art of barbecuing, including the techniques for creating succulent bbq ribs recipe.

They mastered the method of slow-cooking spareribs over open pits, imparting a signature smoky essence that has become synonymous with barbecue ribs.

As BBQ ribs recipe traditions took root in America, they blossomed into a cherished part of the nation’s culinary heritage, with each region adding its own twist.

Whether it’s the sweet and tangy Kansas City-style or the vinegar-based concoctions of North Carolina, spareribs have become an indispensable element of barbecue ribs culture.

Nowadays, spareribs are a celebrated dish in BBQ restaurants and family cookouts, securing their revered spot in American dining.

Cooking Spareribs at Home

While savoring grilled ribs at a BBQ restaurant is enjoyable, preparing grilled ribs at home offers a unique charm.

You gain complete control over the seasonings and can express your culinary creativity, making cooking ribs in oven or on the grill a fulfilling endeavor.

The joy of cooking spareribs at home lies in the camaraderie it fosters among friends and family, as well as the delicious memories it creates.

Moreover, opting to cook spicy spareribs at home is not only a budget-friendly choice but also allows for personalizing the heat level to your liking.

By selecting quality spareribs and using your favorite spices from your pantry, you can whip up a delectable feast affordably.

So, take the plunge into a flavorful journey and introduce the sizzling taste of cooking ribs at home into your culinary repertoire.

Understanding the Different Types of Ribs

Before embarking on the grilling journey, it’s crucial to understand the various types of ribs you can choose from.

Popular options include baby back ribs, known for their tenderness, spareribs with their rich flavor due to more connective tissue, and St. Louis-style ribs, which are trimmed spareribs offering a neat, rectangular shape.

Each type, from baby back ribs to St. Louis-style ribs, brings its own unique qualities to the grill.

Choosing the Right Cut of Spareribs

In the quest for the best spareribs, consider ribs with consistent marbling and a modest amount of fat to keep the meat succulent throughout the grilling process.

Look for meaty ribs that promise a fulfilling bite and, if you can, source your spareribs from a reputable local butcher known for quality meat.

The caliber of the spareribs you choose is pivotal to your barbecue success, so investing in the best spareribs is a treat for your palate.

Preparing the Ribs for Grilling

Preparing ribs properly is essential for the best results.

Begin by removing the membrane on the underside of the ribs to ensure they’re ready for cooking. This involves inserting a knife between the membrane and the meat, then using a paper towel for better grip to peel it off.

While some recipes suggest removing the membrane, keeping it intact can actually help maintain the ribs’ juiciness and enhance their flavor.

With the membrane removed, it’s time to apply a homemade BBQ rub to season the spareribs.

Craft your own rib rub by mixing spices such as paprika, garlic powder, onion powder, and brown sugar, with a hint of cayenne pepper for some heat.

Thoroughly massage the BBQ rub onto both sides of the rack, ensuring the spices fully coat the meat. Let the spareribs rest at room temperature for at least 30 minutes, which allows the BBQ rub to deeply infuse the meat with flavor.

Creating the Perfect Dry Rub

A dry rub, a blend of spices and herbs, is pivotal in adding layers of flavor to the ribs.

To start, mix garlic powder, onion powder, smoked paprika, red pepper flakes, black pepper, cayenne pepper, cumin, and dried herbs like thyme or oregano in a bowl.

Combine these spices for ribs until they’re well mixed.

This classic rib rub will not only enhance the natural taste of your spareribs but also introduce a smoky heat that’s irresistible.

Marinating the Ribs

Marinating ribs is a step that shouldn’t be overlooked, as it allows the dry rub to deeply season the meat, making it more tender and flavorful.

After the dry rub is applied, place the ribs in a roasting pan or on a baking sheet, cover with plastic wrap, and refrigerate.

Marinate for a minimum of one hour or up to a full day to ensure the flavors fully permeate the meat for a savory result.

The Secret Ingredient: Hot Sauce

To give your spareribs a fiery edge, incorporate hot sauce into your spicy rib recipe.

The nuanced flavors and heat from the hot sauce ribs combination will enhance the richness of the spareribs, delivering a tantalizing taste that’s hard to resist.

Choose from a variety of hot sauces to customize the spice level to your liking.

Creating a homemade spicy barbecue sauce can take your ribs to the next level.

Start by blending fresh chili peppers, garlic, vinegar, and salt until smooth, adjusting the chili quantity to suit your heat preference.

Once your spicy barbecue sauce is ready, use it to marinate the spareribs and let the flavors meld together for a truly delectable experience.

Marinating the Spareribs with Hot Sauce

For deeply flavored spareribs, it’s crucial to marinate them with a robust spare ribs marinade.

The longer the ribs soak in the marinade, the more pronounced the flavors will be.

For optimal results, let the spareribs marinate overnight in the hot sauce-based mixture, which will tenderize the meat and ensure fall-off-the-bone tenderness.

For the most flavorful pork spare ribs marinade, place the marinated spareribs in a resealable plastic bag or a covered dish, ensuring the marinade thoroughly coats every inch of the meat.

Refrigerate the spareribs, allowing them to marinate for at least 12 hours, or up to 24 hours for a deeper flavor.

This step is essential for achieving the ultimate spicy spareribs that will tantalize your taste buds.

Cooking Methods for Ribs - Grilling vs. Oven

When it comes to cooking spareribs, you can opt for charcoal grill ribs to achieve that signature smoky flavor, or choose oven baked ribs for their convenience.

Each cooking method has its own benefits, so consider both to determine which aligns with your culinary preferences and the flavor you’re aiming for.

Step-by-Step Guide to Grilling Spareribs

Grilling spareribs not only bestows a smoky flavor ribs aficionados crave but also results in a charred and caramelized crust that enhances the meat’s texture.

Begin by preheating your grill to medium heat and oiling the grates.

Place the marinated spareribs on the grill, bone side down, and close the lid.

For that rich hickory smoked ribs essence, cook for about 2-3 hours, depending on the rack’s thickness.

As you grill spareribs, baste them periodically with a basting sauce for pork ribs to amplify the flavors.

Rotate the rack occasionally for even cooking.

A meat thermometer should read 165°F (74°C) to confirm doneness.

After the grilled spareribs are cooked through, let them rest for 10 minutes before slicing and serving.

Step-by-Step Guide to Oven-Baked Spareribs

If outdoor grilling isn’t feasible or you’re after a simpler method, oven baking ribs is an excellent choice.

Start by preheating your oven to 275°F (135°C) and lining a baking sheet with aluminum foil.

Arrange the marinated spareribs on the sheet, bone side down, and cover them tightly with foil to lock in moisture.

To bake ribs to perfection, cook them for about 2.5 to 3 hours, or until the meat is tender enough to pull away from the bone.

In the final 30 minutes, remove the foil and glaze the spareribs with additional hot sauce, allowing it to caramelize on the aluminum foil-wrapped ribs.

Let the spareribs rest briefly after removing them from the oven before serving.

Adding Smoke for Extra Flavor

For smoke infused ribs, introduce smoke during the grilling process. On a charcoal grill, add hardwood chunks or soaked wood chips directly to the charcoal.

For gas grills, use a smoker box or wrap soaked wood chips in aluminum foil with holes for the smoke to escape.

Hickory smoked ribs are a crowd-pleaser, but you can also experiment with apple or mesquite wood chips to infuse the ribs with a delightful smoky aroma that elevates their flavor.

Basting with Barbecue Sauce

As the barbecue sauce ribs near the end of their cooking time, it’s time to introduce the sauce.

Brush the ribs generously with your favorite barbecue sauce, covering both sides.

This step adds a sweet and tangy glaze to the ribs, creating a caramelized finish.

Allow the sticky ribs to cook for an additional 15 to 20 minutes, continuing to baste them with barbecue sauce every few minutes.

This process will help create a sticky, flavorful coating that complements the smoky and savory flavors of the ribs.

Checking for Doneness

To ensure that the spareribs are cooked to perfection, it’s essential to check doneness of ribs.

The internal temperature of the ribs should reach between 190°F and 203°F. You can use an instant-read thermometer to check the temperature by inserting it into the thickest part of the meat, away from the bone.

Additionally, the meat should be tender and easily pull away from the bone when gently tugged.

If the ribs need more time, you can continue grilling them until they reach the desired level of tenderness.

Adding the Finishing Touches

Once the ribs have cooked low and slow, it’s time to add the finishing touches.

Brush on your favorite barbecue sauce to enhance the flavor and create a sticky glaze.

Increase the heat to medium-high and finish grilling ribs for an additional 5 minutes on each side.

This will caramelize the sauce and create a beautiful charred exterior, resulting in caramelized ribs.

Resting and Serving

Once the spareribs are cooked to perfection, it’s crucial to let them rest before serving ribs.

Transfer the ribs to a cutting board and loosely cover them with aluminum foil.

Let the resting ribs rest for about 10 to 15 minutes.

This resting period allows the juices to redistribute, resulting in a more tender and flavorful eating experience.

After the resting period, it’s time to slice the ribs between each bone.

Serve them hot and enjoy the succulent, smoky, and delicious spareribs you’ve worked so hard to create.

Serving Suggestions and Side Dish Ideas

Now that your spicy spareribs are cooked to perfection, it’s time to think about side dishes for ribs.

Spareribs pair wonderfully with a variety of side dishes that complement their robust flavors.

Here are a few serving suggestions and side dish ideas to elevate your meal:

  1. Classic BBQ sides: Coleslaw, cornbread, and baked beans are traditional BBQ sides that perfectly complement the smoky and spicy flavors of the spareribs.
  2. Grilled vegetables: Fire up the grill and cook some zucchini, bell peppers, and onions to add a healthy and colorful touch to your meal.
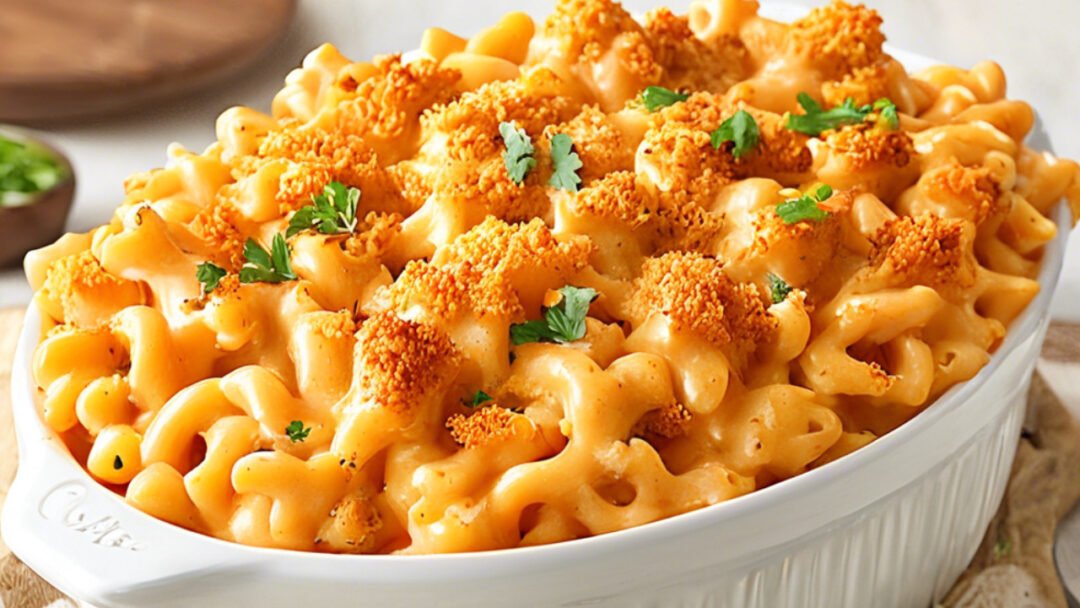
  3. Mac and cheese: Indulge in a creamy and cheesy macaroni and cheese dish that will have everyone reaching for seconds.
  4. Potato salad: A refreshing and tangy potato salad is a crowd-pleasing side that balances out the richness of the spareribs.
  5. Corn on the cob: Grill or roast some juicy corn on the cob, slathered with butter and sprinkled with chili powder for an extra kick.

Feel free to mix and match these suggestions or experiment with your own favorite side dishes.

The key is to create a well-rounded meal that complements the star of the show – the spicy spareribs, making them ideal for tailgating with ribs at events.

Storing and Reheating Tips

  • Choose high-quality ribs with good marbling for the best flavor and tenderness.
  • Experiment with different spice rubs and barbecue sauces to find your perfect combination.
  • Keep an eye on the temperature of your grill to maintain consistent heat throughout the cooking process.
  • Let the grilled spareribs rest for a few minutes before serving to allow the juices to redistribute and ensure maximum tenderness.
  • Don’t be afraid to get creative and add your own twist to the recipe. Try incorporating different herbs, spices, or marinades to personalize your grilled spareribs.

Tips for Achieving the Perfect Flavor Explosion

Creating the ultimate flavor explosion ribs with your spicy spareribs requires a little finesse.

Here are a few tips to help you achieve sparerib perfection and ensure that every bite is a flavor explosion:

  1. Temperature control: Whether grilling or baking, maintaining a consistent temperature is crucial. This ensures even cooking and tender, juicy spareribs.
  2. Low and slow: Cooking spareribs at a low temperature for an extended period allows the flavors to develop and the meat to become tender. Patience is key!
  3. Basting is essential: Regularly basting the spareribs with hot sauce not only adds flavor but also helps to keep them moist throughout the cooking process.
  4. Let them rest: Allowing the spareribs to rest for a few minutes after cooking ensures that the juices redistribute, resulting in moist and succulent meat.
  5. Experiment with hot sauces: Don’t be afraid to try different hot sauces to find your favorite flavor profile. From smoky chipotle to tangy habanero, the possibilities are endless.

Remember, cooking is an art, and as the saying goes, practice makes perfect ribs.

With each attempt, you’ll refine your skills and create spareribs that are tailored to your taste buds, embodying the essence of ‘practice makes perfect’ in your culinary pursuits.

Alternative Cooking Methods for Spareribs

While grilling and oven baking are the most popular methods for cooking spareribs, exploring alternative cooking methods for ribs can yield equally delicious results.

Here are a few alternative cooking methods to consider, offering a variety of flavors and textures:

  1. Slow cooker: Place the marinated spareribs in a slow cooker and cook on low heat for 6-8 hours. The result is tender, fall-off-the-bone spareribs with minimal effort.
  2. Sous vide: Vacuum-seal the marinated spareribs and cook them in a water bath at a controlled temperature for several hours. Finish them off on the grill or under the broiler for a crispy exterior.
  3. Smoker: If you’re a fan of authentic BBQ flavors, invest in a smoker to slow-cook your spareribs over aromatic wood chips. The result is a smoky and flavorful experience that is worth the extra effort.

By experimenting with different cooking methods, you can discover new and exciting ways to enjoy the spicy goodness of spareribs.

Conclusion

Grilling spareribs is a labor of love that yields incredibly delicious results.

With the right techniques and a little patience, you can create tender, juicy, and flavorful ribs that will impress your family and friends.

Follow this guide, experiment with different flavors, and enjoy the satisfaction of mastering grilling spareribs.

Get ready to fire up the grill and embark on a culinary adventure that will leave everyone craving more.

Disclaimer: The information provided in this article is for informational purposes only. It is not intended to be a substitute for professional advice or instruction. Always follow the safety guidelines provided by your grill manufacturer and exercise caution when handling hot surfaces and open flames.

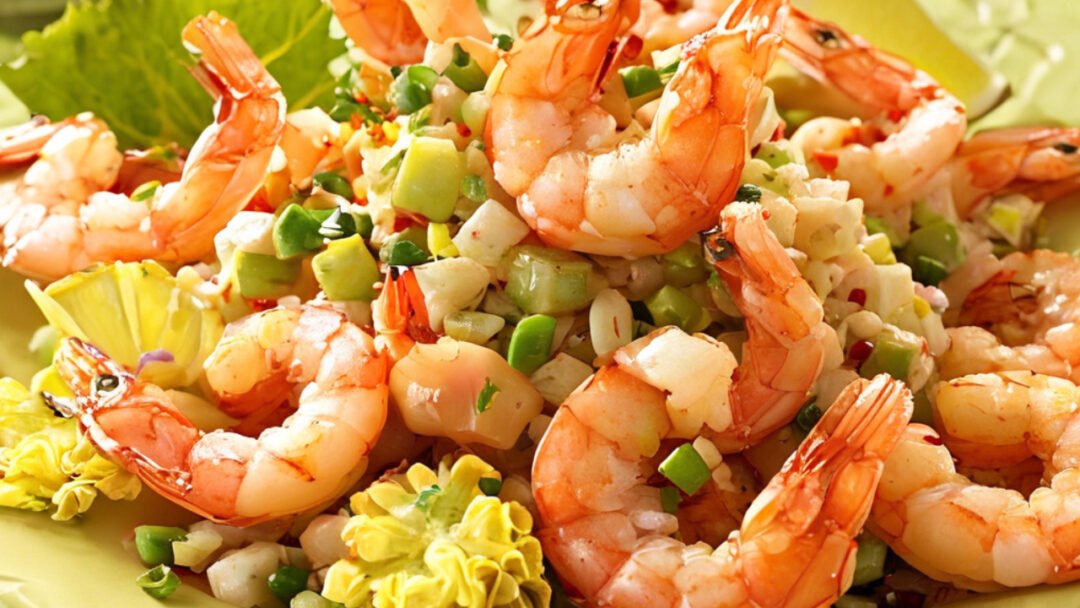
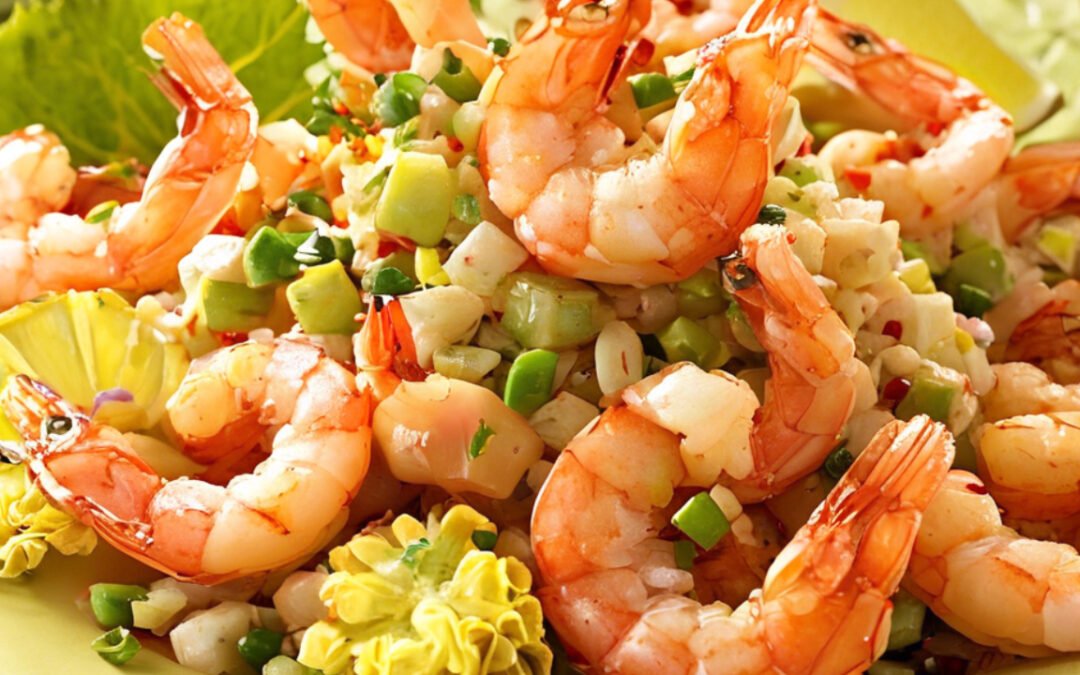
Shrimp Cocktail: The Best Easy Recipe For Cocktail Party

Shrimp Cocktail: The Best Easy Recipe For Cocktail Party

Shrimp Cocktail: The Best Easy Recipe For Cocktail Party



Extra Hot Dipping Sauce
Original Hot Sauce



Prep Time: 12 minutes
Cooking Time: 3 minutes



Servings: 4
Serving Size: 5-6 shrimps per serving

The “Spicy Shrimp Cocktail” recipe offers a fiery twist on the classic dish, combining succulent shrimp with a zesty cocktail sauce infused with horseradish and hot sauce. The shrimp is poached to perfection and served with a flavorful cocktail sauce balanced with lemon juice and ketchup. The dish is versatile, suitable for elegant gatherings or as a spicy snack. The recipe includes ingredients, preparation, cooking time, and serving details, making it a crowd-pleaser for any occasion.

Ingredients

For the Shrimp:

1 pound (450 grams) large shrimp, peeled and deveined

Salt and black pepper, to taste

Lemon wedges, for garnish

For the Spicy Cocktail Sauce:

1/2 cup of ketchup

2 tablespoons of horseradish



1 tablespoon Extra Hot Dipping Sauce

1 tablespoon lemon juice

1/2 teaspoon Worcestershire sauce

1/2 teaspoon garlic powder

1/2 teaspoon celery salt

Optional: fresh cilantro or parsley, for garnish

Instructions

Step 1

Fill a large pot with water and season it with salt and black pepper. Bring the water to a boil.

Step 2

Add the peeled and deveined shrimp to the boiling water and cook for about 2-3 minutes or until they turn pink and firm. Be careful not to overcook.

Step 3

While the shrimp are cooking, prepare an ice bath by filling a large bowl with ice and water.

Step 4

Once the shrimp are cooked, immediately transfer them to the ice bath to cool rapidly and stop the cooking process. This will help the shrimp maintain their tenderness.

Step 5

Drain the shrimp from the ice bath and refrigerate until ready to serve.

Step 6

  1. In a small bowl, combine the ketchup, horseradish, Extra Hot Dipping Sauce, lemon juice, Worcestershire sauce, garlic powder, and celery salt to create the spicy cocktail sauce. Adjust the amount of hot sauce to your desired level of spiciness.

Step 7

Arrange the chilled shrimp on a serving platter or individual cocktail glasses.

Step 8

Serve the Spicy Shrimp Cocktail with the zesty cocktail sauce and garnish with lemon wedges and fresh cilantro or parsley if desired.

Step 9

Enjoy this delightful twist on a classic appetizer that’s perfect for adding a spicy kick to your next gathering or as a refreshing and spicy snack.

Frequently Asked Questions

Spicy Meatballs: The Best Quick Recipe for Hearty Snack

Spicy Meatballs: The Best Quick Recipe for Hearty Snack

Spicy Meatballs: The Best Quick Recipe for Hearty Snack



Extra Hot Dipping Sauce
Original Hot Sauce



Prep Time: 15 minutes
Cooking Time: 30 minutes



Servings: 4
Serving Size: 5 meatbalss per person

The Spicy Meatballs recipe offers a bold and zesty culinary adventure, with meatballs simmered in a fiery tomato sauce. The secret lies in the seasoned meat mixture and vibrant tomato sauce, creating an irresistible dish. The recipe is versatile, allowing customization of the spice level to preference. The ingredients, preparation, and serving suggestions are provided, making it an ideal dish for various occasions.

Ingredients

For the Meatballs:

1 pound (450 gr) ground beef

1/2 lb ground pork

1/2 cup breadcrumbs

1/4 cup grated Parmesan cheese

1/4 cup chopped fresh parsley

1 egg



1 tablespoon Extra Hot Dipping Sauce

1 tablespoon Extra Hot Dipping Sauce

Salt and pepper, to taste

For the Spicy Tomato Sauce:

1 can (14 oz) crushed tomatoes

1/4 cup tomato paste



1 teaspoon Extra Hot Dipping Sauce

1 teaspoon dried oregano

2 cloves garlic, minced

Salt and pepper to taste

Instructions

Step 1

In a large bowl, combine ground beef, ground pork, breadcrumbs, Parmesan cheese, chopped parsley, egg, Extra Hot Dipping Sauce, salt, and pepper. Mix until well combined.

Step 2

Shape the mixture into meatballs, about 1 inches in diameter.

Step 3

In a separate pan, heat some oil over medium heat and brown the meatballs on all sides until they are cooked through. Remove them and set aside.

Step 4

In the same pan, add minced garlic, crushed tomatoes, tomato paste, Extra Hot Dipping Sauce, dried oregano, salt, and pepper. Simmer the sauce for about 15-20 minutes.

Step 5

Return the meatballs to the sauce and simmer for an additional 10 minutes until they are heated through and coated with the spicy tomato sauce.

Step 6

Serve your Spicy Meatballs hot, garnished with fresh parsley, and enjoy!

Frequently Asked Questions